


Share
At some point most of the car owners run into this problem: how to remove window tint. The tint that used to once look clean and sharp now actually looks tired and dull.
Maybe it’s the bubbling near the edges. Or maybe it’s turned slightly purple. Or maybe it’s peeling from one corner and catching your eye every single time that you drive.
That’s usually when the question comes up about how to remove window tint, and whether it’s something you can handle on your own or not.
Removing old tint isn’t actually that complicated, but it’s also not something you would want to rush into without actually knowing what you’re doing. If done carefully it’s manageable. And if done wrong it can turn into scratched glass, damaged defroster lines or even hours of frustration scraping glue that refuses to come off.
This guide walks through when the tint removal is necessary and what to watch out for, the safest DIY methods and also what to do once the tint is finally gone.
When Your Tint Has Failed
Leaving bubbling or fading tint on your car isn’t just an eyesore. It can actually become a safety issue over time. Old tint often loses its ability to block glare properly. Instead of reducing sunlight, it distorts it. Driving into the sun with hazy or bubbling tint can make visibility worse, not better.
Heat and UV exposure are the main culprits behind tint failure. Over the years, the adhesive breaks down. Air pockets form. The film starts to shrink or discolor. In some cases, it looks fine from the outside but becomes cloudy when viewed from inside the car, especially at night.
There’s also the legal side. Faded tint can darken unevenly, which sometimes pushes it beyond legal limits without the driver realizing it. A tint meter doesn’t care if the film is old. If it reads too dark, it’s still a violation.
When tint reaches this stage, removal is the only real option. Trying to live with it actually usually makes things worse. The longer the failed tint stays on the harder it becomes to remove it cleanly.
Be Careful About Your Rear Window's Heater Lines
Rear windows are different from side windows because they contain defroster or heater lines. These thin lines are bonded to the glass and are extremely easy to damage. Scraping it too aggressively or even pulling tint too fast can tear them right off. Once that happens the defroster stops working and repairing it is neither cheap nor simple.
When learning how to remove window tint this is the area that requires the most patience. You never want to use a sharp blade directly on the rear glass. Even the plastic scrapers should be used gently and only when its absolutely necessary.
Heat is your best friend here. The more you soften the adhesive the less force you would need to apply. Slow peeling at a shallow angle reduces stress on the heater lines. If the tint resists, stop. Pulling harder almost always leads to damage.
Many people can remove side window tint easily but struggle with the rear window. That’s not a failure. It’s just the most delicate part of the process.
Recommended DIY Methods
There are only a few proven ways to remove the window tint at home. Each has its own place and the best method often really depends on how old the tint is and also which window you’re working on.
One of the most common methods is by heat removal. Using a heat gun or hair dryer warms the tint from the outside of the glass. The goal is to soften the adhesive and not melt the film while doing it. Once it’s warm enough then lift a corner gently and peel it slowly. If this is done correctly the large sections can come off in one piece.
Another popular approach is the steam method. A garment steamer actually works surprisingly well for this. Steam penetrates the adhesive and loosens it properly. This method is especially very useful for the rear windows because it reduces the need for scraping. Most people find the steam to be the cleanest option when learning how to remove window tint without damage.
Some DIY guides mention using ammonia and plastic wrap. While sometimes it does work but it’s not really ideal for enclosed spaces and hot climates. The fumes are very strong and prolonged exposure isn’t really pleasant. But if you do use this method then proper ventilation is essential.
No matter which method you choose, patience matters more than strength. Tint should come off with steady pressure. If it tears constantly then the adhesive isn’t warm enough yet.
How to Remove the Stubborn Glue That Stays Behind
Removing the film is only half of the job. The leftover adhesive is what usually tests people’s patience.
Old tint glue turns into a sticky, uneven layer that attracts dust instantly. Scraping it dry rarely works and it often leaves streaks which is worse. The key is to keep the surface lubricated while you’re working on it.
Soapy water, glass cleaner without ammonia or even dedicated adhesive removers all help soften the residue. You should let the solution sit for sometime like a minute or two before wiping it. Microfiber cloth works better than paper towels because they don’t shred or leave lint behind.
For stubborn areas a plastic scraper can definitely help but make sure to always keep the surface wet. Dry scraping increases the risk of scratches. On rear windows avoid scraping across the heater lines but instead you should move parallel to them.
This stage takes time, and that’s normal. Rushing through glue removal often leaves smears that only show up in sunlight later. A clean glass surface should feel smooth to the touch once you’re done.
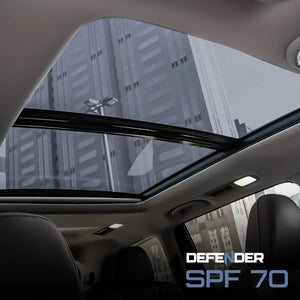
Fresh Start: Time to Upgrade to GSWF Window Tint
Once the old tint is gone and the glass is clean most people tend to immediately notice how bare the car feels. Without the tint the interior actually heats up faster, glare increases and the privacy disappears. That’s usually when the upgrading becomes the next step.
Installing a high-quality tint after removal makes a huge difference. Modern films perform far better than older ones. They block more heat, resist fading, and stay clearer over time. GSWF window tint is designed specifically to avoid the common issues that lead people to search for how to remove window tint in the first place.
A fresh installation also ensures legal compliance. New tint is usually measured accurately and applied evenly which helps avoid uneven darkness or even inspection problems. If professionally installed, the film adheres better and cures properly which reduces the risk of bubbling or peeling later.
So, can you remove window tint yourself? In many cases, yes. With the right tools, patience and good technique.
Once the old tint is gone upgrading to a new modern high-quality film like GSWF gives your car a very fresh start. Better visibility, improved comfort and also a long-term durability that makes the effort worthwhile.